Smartphone screenshots are useful in a number of different situations. If you’re experiencing a bug or software problem with a particular app, you can snap a screenshot to send the developer. Using this information, they can either update the app or provide you with further instructions on how to solve the issue. Of course, screenshots are also helpful for saving information — websites, text messages, webpages, setting configurations, etc. — on the fly.
If you own a Samsung Galaxy S5, you might be wondering how, or even if, it has a built-in screenshot function. Well, the Galaxy S5 does feature a screenshot function, allowing device owners to quickly and easily save their display as an image file. With that said, there’s no conspicuous button or app marked “screenshot,” so some users may have difficulty finding it. Here we’re going to walk you through the steps of taking a screenshot on the Galaxy S5 using two different methods.
Screenshot Method #1)
- Power up your Galaxy S5.
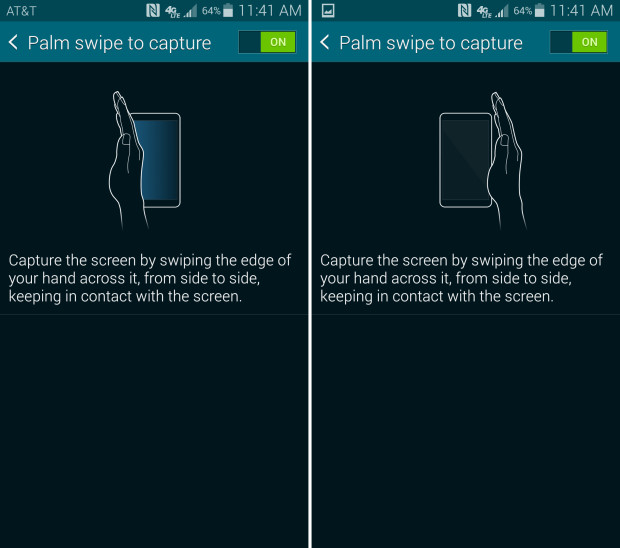
- Access the Settings > Motions and gestures > Palm motion. (Palm motion must be enabled in order to take a screenshot using this method)
- When you’re ready to take a screenshot, swipe the palm of your hand from the left to right side of your device.
- If the screenshot is successful, you will receive a notification.
The trick to taking a screenshot using this method is to create a chopping gesture with your hand (fingers side by side) and sliding it from the left side of the device to the right.
Screenshot Method #2)
The second method, and arguably the easiest of the two, involves holding down the home and volume button. When you are ready to snap a screenshot, simultaneously press and hold the volume and home button for a couple of seconds. You should then hear a shutter or clicking sound, indicating the screenshot was successfully taken. Release the volume and home buttons and check your device to ensure the screenshot saved correctly.
Regardless of which method you use, all screenshots taken on the Galaxy S5 will be saved in your photos. You can access them directly through the Photo Gallery app or My Files app. Screenshots can be viewed, turned into slideshows, emailed, sent as picture messages, or uploaded to social media. Just remember to check them for sensitive information before uploading them to a public location.
Did these steps work for you? We’d love to hear what you think in the comments section below!


No Comments